Colt help
Uploading a document
You can store documents in Control Center that you need to manage your Colt services—so that members of your organization can access them from a central location. When you upload a document, you can specify whether everyone in your organization can view the document or whether only users you specify can view the document. When you no longer need the document, you can delete the document. You can upload documents up to 15 MB in size and you can store up to 50 GB total per enterprise ID. You can also edit the description for a document if you need to change it later.
Note: Control Center stores General and Services documents for six months from the upload date and stores Colocation and Security documents for two years from the upload date.
To upload a document:
- Click Admin, then click Documents.
Control Center lists all documents you have access to for your organization.

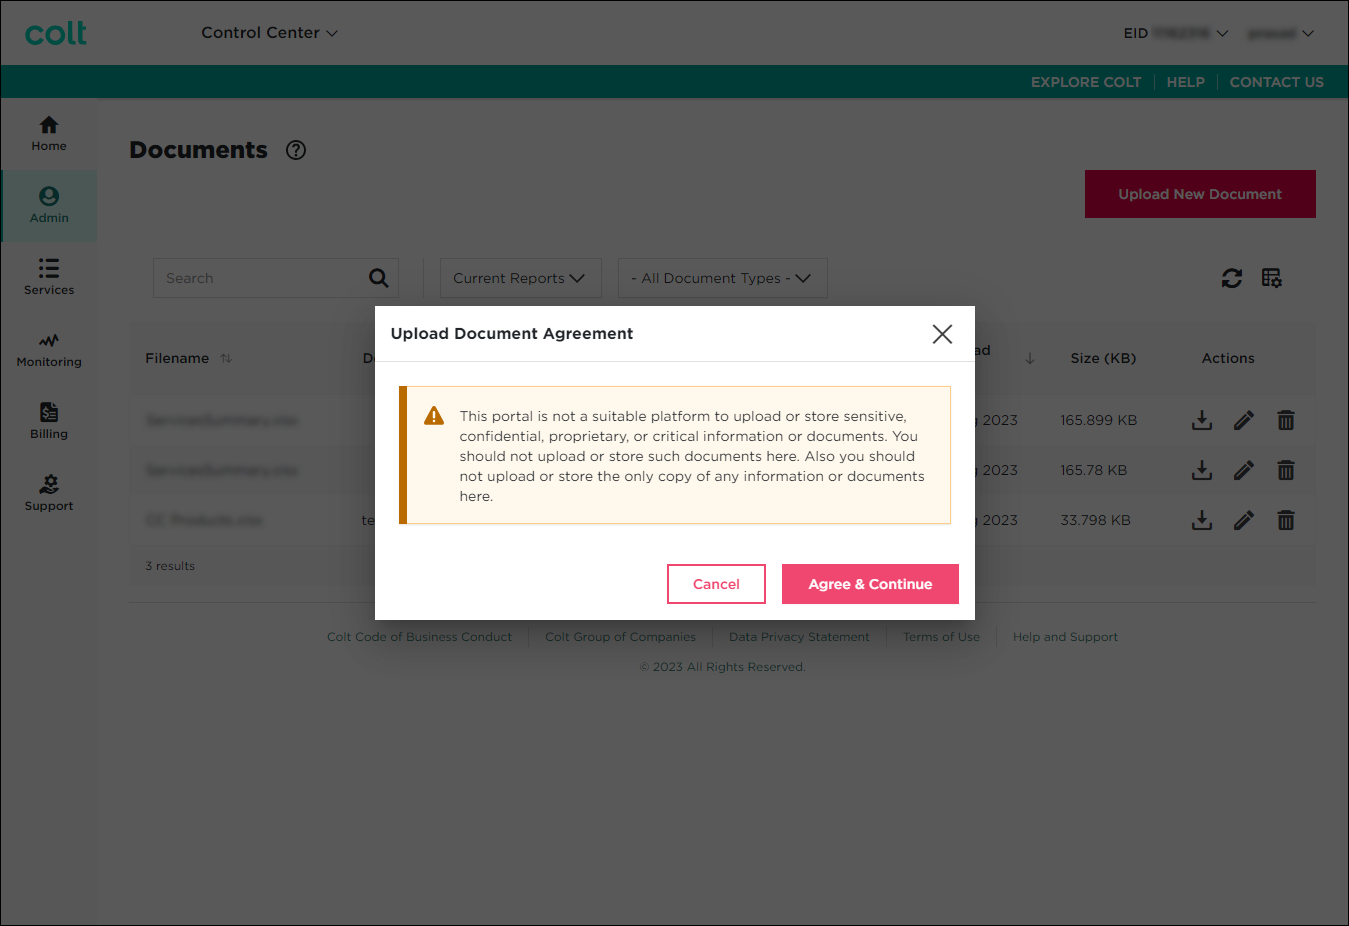
- Click UPLOAD NEW DOCUMENT.

- Review the upload agreement, then click AGREE & CONTINUE.

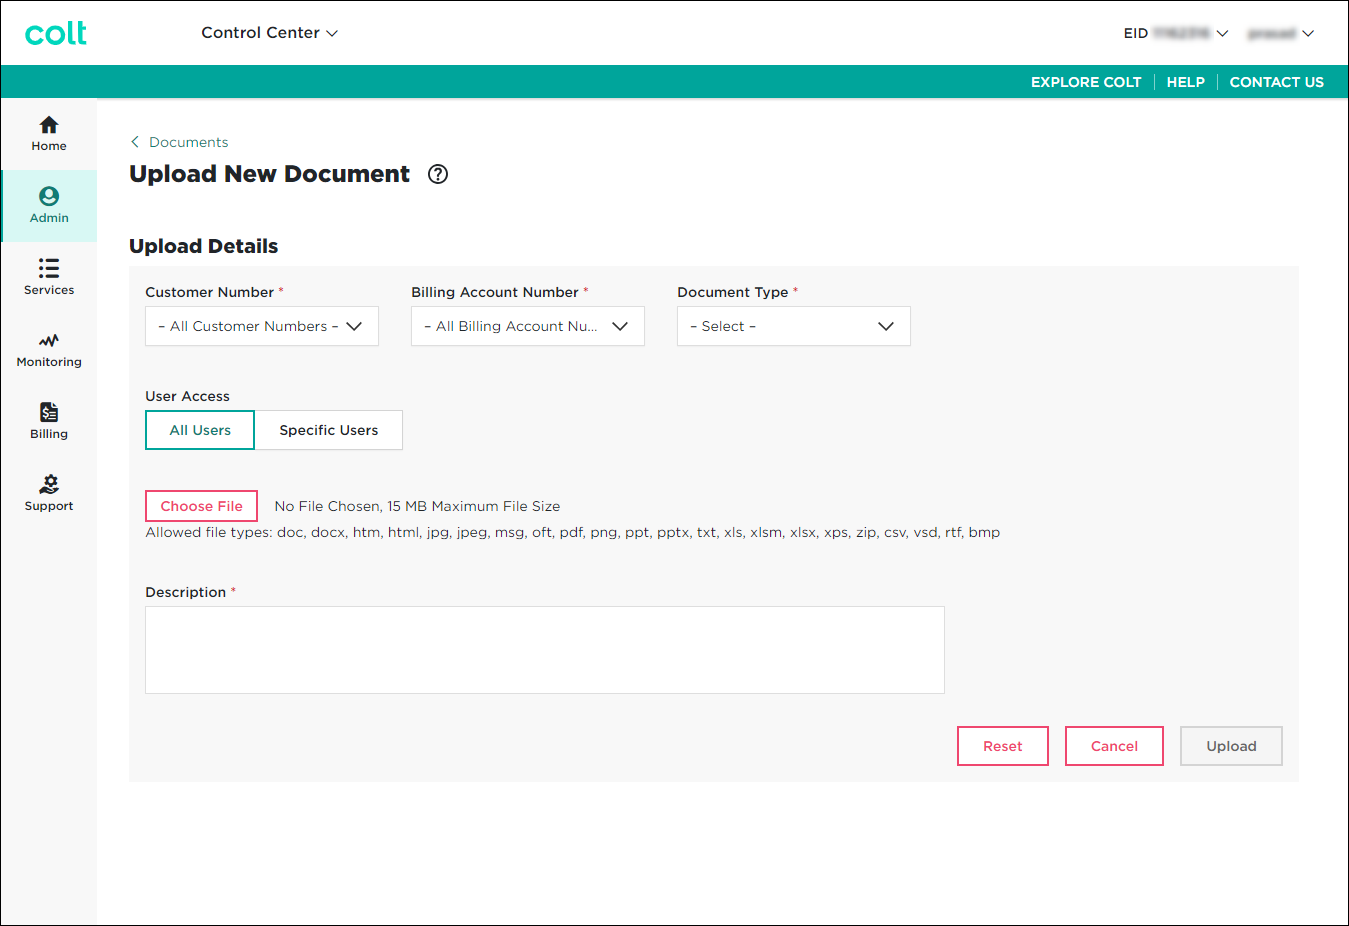
- From the Customer Number and Billing Account Number lists, select the customer number and billing account number you want the document to be listed for. (By default, Control Center makes the document available for all customer numbers and billing account numbers under your enterprise ID.)
- From the Document Type list, select the type of document you're uploading. (For example, if you're uploading a document with information for managing security services for your organization, select Security.)
- In the User Access section, select who in your organization can have access to the file you're uploading:
- If you want everyone in your organization to have access to the document, select All Users.
- If you want to specify people who can access the document, select Specific Users, select the checkbox for the user(s) you want to have access.
- If you want everyone in your organization to have access to the document, select All Users.
- Click Choose File, browse to the file you want to upload, then click Open.
- In the Description field, type a description for the document (such as the document title or purpose).
- Click UPLOAD.
Control Center adds the document to the list of account documents. For the next 30 days, Control Center lists the document as new.
Not quite right?
Try one of these popular searches:
Explore Control Center
Top 10 articles
- Troubleshooting login problems
- Retrieving your username or password
- Signing in to Control Center
- Adding accounts to an enterprise ID
- Requesting a PDF copy of an invoice
- Creating a repair ticket
- Creating a disconnect request
- Deactivating or reactivating a Control Center user
- Creating a new user
- Editing a notification setting


